Guide to capturing and captioning images
What kind of images should you use? Images should illustrate or otherwise complement the subject matter of your digital exhibit. Images add to the visual appeal, historical context, visual argument of your exhibit.
INCLUDE: Primary source artwork from your Yellow Nineties Magazine that relates to your topic; magazine cover and title page; textual decorations; portraits of people you write about.
OPTIONAL: Victorian artwork that depicts some aspect of your subject matter, including the original colour versions of the artwork reproduced in your magazine; or Victorian photographs that depict some aspect of your subject matter. Remember, all images must be in the public domain.
A few ways to capture images…
From the material copy of your magazine in Special Collections:
- Make an appointment with Special Collections to see your magazine
- Take photographs of the images you want with your phone or camera
- Upload your images to the Media Library on the Y90s Classroom site for use in your digital exhibit
From your magazine volume on Y90s 2.0:
- If your image is available in jpg, download it
- If your image is only available in flipbook format, scroll to the page with the image you want to capture; take a screenshot
- In Windows open the “Snipping” tool
- On Mac open the “Grab” tool
- Use either of these tools to choose a selection of the page
- Save the image as a jpeg; resize if necessary (see below)
- Upload your images to the Media Library* on the Y90s Classroom site for use in your digital exhibit
From other websites that store public domain images:
In addition to Ryerson Special Collections and the Y90s Online, you can capture images from a number of online resources, but you must ensure they are in the Public Domain, and you must specify the source of the image in the caption. Here are some useful links for public domain images:
- Wikimedia Commons: https://commons.wikimedia.org/wiki/Main_Page
- Tate Modern: https://www.tate.org.uk/visit/tate-modern (go to Artists and Art)
- Yale Center for British Art: https://britishart.yale.edu/ (go to Search the Collection)
- New York Public Library: https://digitalcollections.nypl.org/ (go to Research –Digital Collections; click “search only public domain materials)
- British Library Pictures on Flickr https://www.flickr.com/photos/britishlibrary/
- Google Images: https://www.google.com/ (select “tools”—“usage rights”—noncommercial reuse)
To add a new image to the Media Library to use in your exhibit, take the following steps:
- Ensure the image you want to use is in the public domain; download it to your desktop (if there is no clearly labeled option for downloading, right-click or control-click on the image and select the option to “Save Image As…”)
- Before uploading to the Media Library in the Y90s Classroom, ensure the file size of the image you want to use is relatively small (around 50 to 100 KB). You can check the file size by right-clicking (Microsoft) or hitting control + click (Apple) and selecting the option to view info about the file. To reduce the file size, you can use an online tool such as Compressor.io (https://compressor.io/); or, in PREVIEW, go to “tools,” and customize the size using the “adjust size” tool. Generally, 1000 pixels on the longest edge (length or width) is a good measurement for resizing. The resolution should be under 100 dpi if possible.
- Once your image is of a modest file size, open the Y90s Classroom dashboard, go to Media > Add New >then upload your image
- Your image should now appear in the Media Library (Media > Library)
- You should create a caption in the Media Library for your image, using the Media Editor tool. This caption will then be automatically uploaded with the image. For information on creating captions, see examples below.
- The Media Library automatically includes the URL and the title of your file; you need to add the other metadata, including caption.
- Caption credit should include these core elements: Creator’s First name, Last name, Title of work, Medium, Date. Source. Public Domain or Permission/License. (Note that the creator(s)’s name(s) are in regular order, because there is no need for alphabetization in a caption.) See examples below.
- Click edit more details. Add “Alt text” and “description,” then UPDATE. For “alt text”: describe the image so that anyone with a visual impairment has access to voice activation. For description: give a note about its location, original size, etc. Remember to select UPDATE whenever you make changes.
- You can also use the “edit image” function to create a cropped picture or to resize the image in the Media editor. Remember to select UPDATE whenever you make changes
Captions and Copyright
To read more about what elements to include in your caption and how to format it, consult the UBC guide for image citation:
http://copyright.ubc.ca/guidelines-and-resources/support-guides/image-citation-guide/
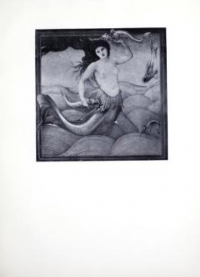
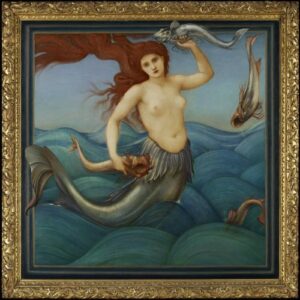
EXAMPLES OF IMAGES AND CAPTION CREDITS


Summary of best practices for crediting digital images online:
- Always use open source or public domain images, or get permission in writing from the creator/owner/subjects to publish the image
- Always provide a caption for the image as close to the image as possible (ideally, immediately below the image)
- Caption credit should include these core elements: Creator’s First Name, Last Name. Title of source, Medium (if relevant), Date. Source(s). Public Domain or Permission/License. (Note that the creator’s name is in regular order, because there is no need for alphabetization in a caption.)
- At the end of your online publication, include the following copyright statement: “Images in this online exhibit are either in the public domain or being used under fair dealing for the purpose of research and are provided solely for the purposes of research, private study, or education.”
- Remember: “fair dealing” means you should restrict the number of images to ONE from a single source if the source is still in copyright; if you use more than one image from a single copyrighted source, be sure you analyze the images so that they are clearly part of your argument and evidence. For materials that are out of copyright, such as those in Yellow Nineties 2.0, there are no restrictions on the number of images you can use.
